Menu

What to choose: Open Source or Custom Development

How to Do Stripe Integration for Strong Customer Authentication

Stripe becomes a prime choice for facilitating different card transactions on the website. Using stripe you can add multiple accounts for your business, plus allow almost all cards for the payment process. Compared to other payment ways, it is more flexible, safe, and customizable. For a better and safe payment platform, today we will show how to do stripe integration using Strong customer authentication (SCA).

What is stripe?

Stripe is a widely known online payment service provider that accepts payment online. It supports multi-currency transactions so that your global business gets handled easily. Compared to other integration, stripe integration is less complicated, plus takes a short time.

Why is SCA the right choice?

Strong customer authentication is a new regulation that aims to reduce online frauds in Europe. To ensure safe online payment, additional authentication is a must in checkout flow to implement SCA.

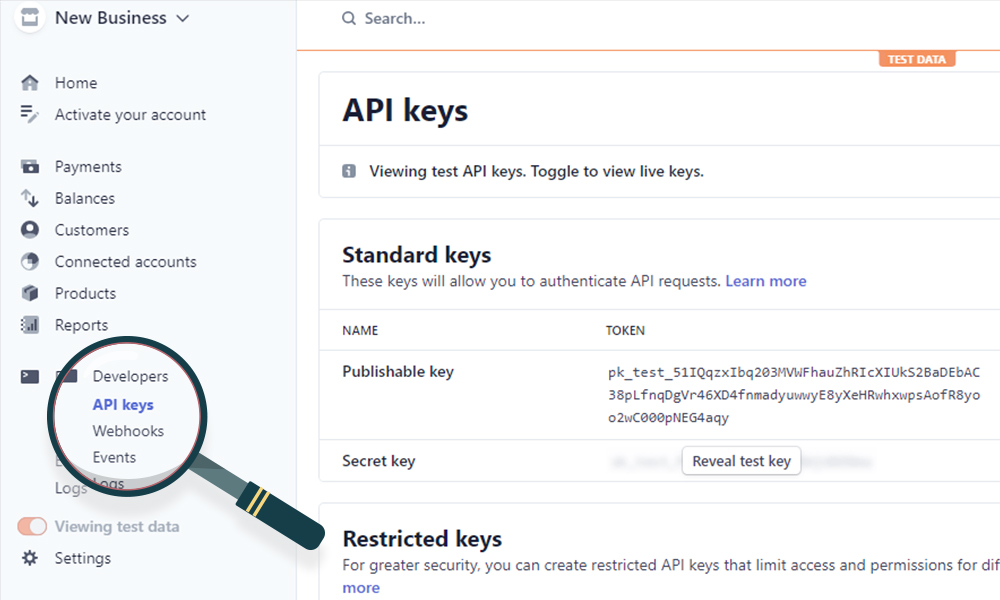
What are the prerequisites for Stripe Integration?

There are the following prerequisites you need for stripe integration.

  • Laravel
  • MySQL
  • NPM
  • VSCode

Once after knowing the prerequisites for Stripe integration, let’s move to the process. Here we have covered each step with the relevant screenshots of the code and screen.

Easy steps for Strip Integration

1. Create a stripe account

Create a stripe account by filling details like email id, full name, country, and password. After that log into the dashboard. Now on the home screen, click on the "developers" option and select API keys to get API. API keys include publishable and secret API keys. These keys in a configuration file are stored as .env.

open source

2. Default payment stripe form

This default payment stripe form includes cardholder name, cardholder email ID, card number, CVV number, expiry date in format mm/yyyy. We generate it using Stripe JavaScript. The form also contains hidden information like item number, item name, currency code, and amount.

open source

3. Complete client-side validation

To handle dynamic payment, include Payment Intent API to drive the payment process smoothly. Each Payment Intent has a unique ID that you can use whenever you need it in the process. Payment Intent also ensures that the customer is charged once for a single transaction. You can use Stripe Elements to customize components in the payment form.

open source
Below is the payment intent code
open source

Once on submitting the customers’ details, it will get validated from the client-side. On successfully submitting the right details, the form gets sent to the server-side, any wrong input will display the error message.

Code for generating stripe form
open source
Code for stripe JS
open source
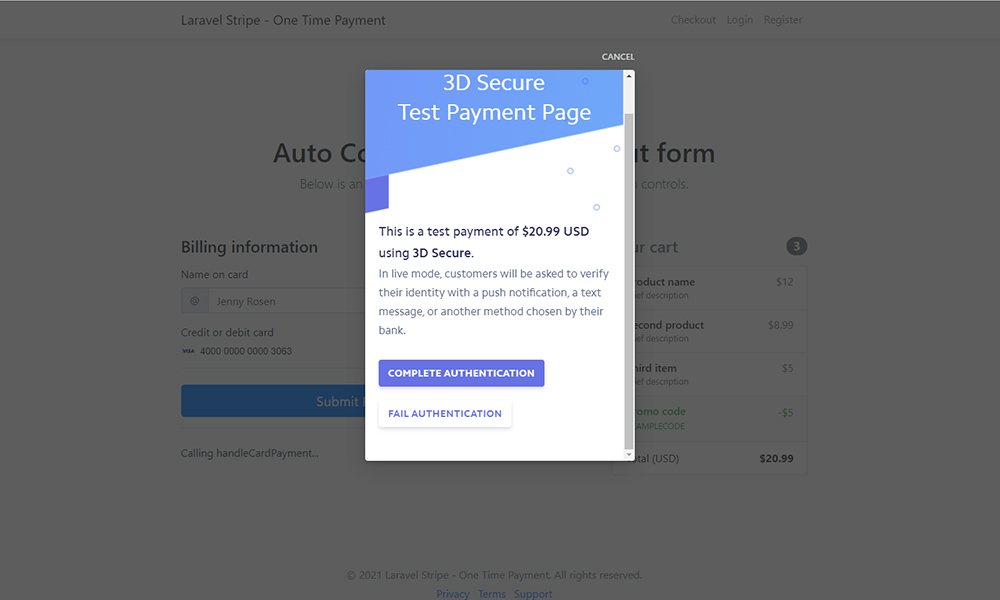
Payment intent confirmation
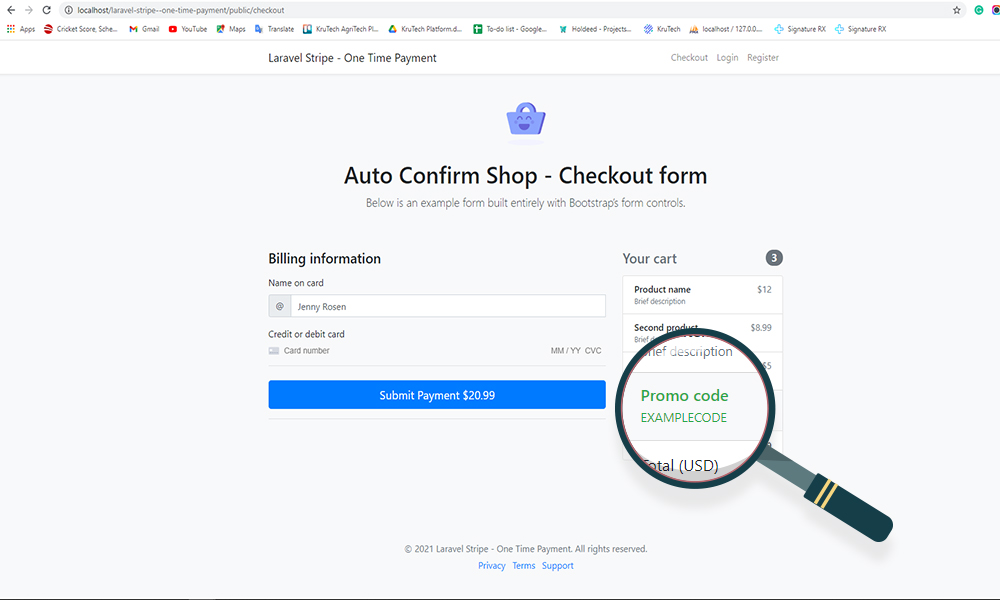
open source
Final form
open source

4. Dynamic 3D security

The next step is Dynamic 3D security verification. An additional pop-up will be generated to double-check the authentication of the user. This helps to reduce online financial fraud. It takes to the next step only when the user inserts a valid code.

open source

5. Process charge

Now download the Stripe PHP library to carry out the processing charges. After receiving the payment, the stripe will return the payment response as an object.

open source

6. Tax code

Once you are done with process charge, now comes the tax code. You can include tax amounts(both exclusively and inclusively) in the invoice generation. Use $tax_rate = \Stripe\TaxRate::create, for more detail checkout the below code screenshot:

open source

7. Invoice generation

Once on completing the above-state instructions, now we will generate the invoice using InvoiceItem. The invoice shows details like a list of goods, cost, quantity, and taxes. Below is the screenshot

open source

8. Invoice download

Once the invoice is generated, you can use the below code’s screenshot to download invoice.

open source

9. Demo testing with stripe payment Gateway

Here we have added the demo video test for your better understanding. https://www.awesomescreenshot.com/video/2933450?key=3887df49d912ea3d9ab7e03af768946d We hope that this piece of writing may have helped you in understanding the integration process with ease.

Let's Discuss Your Project